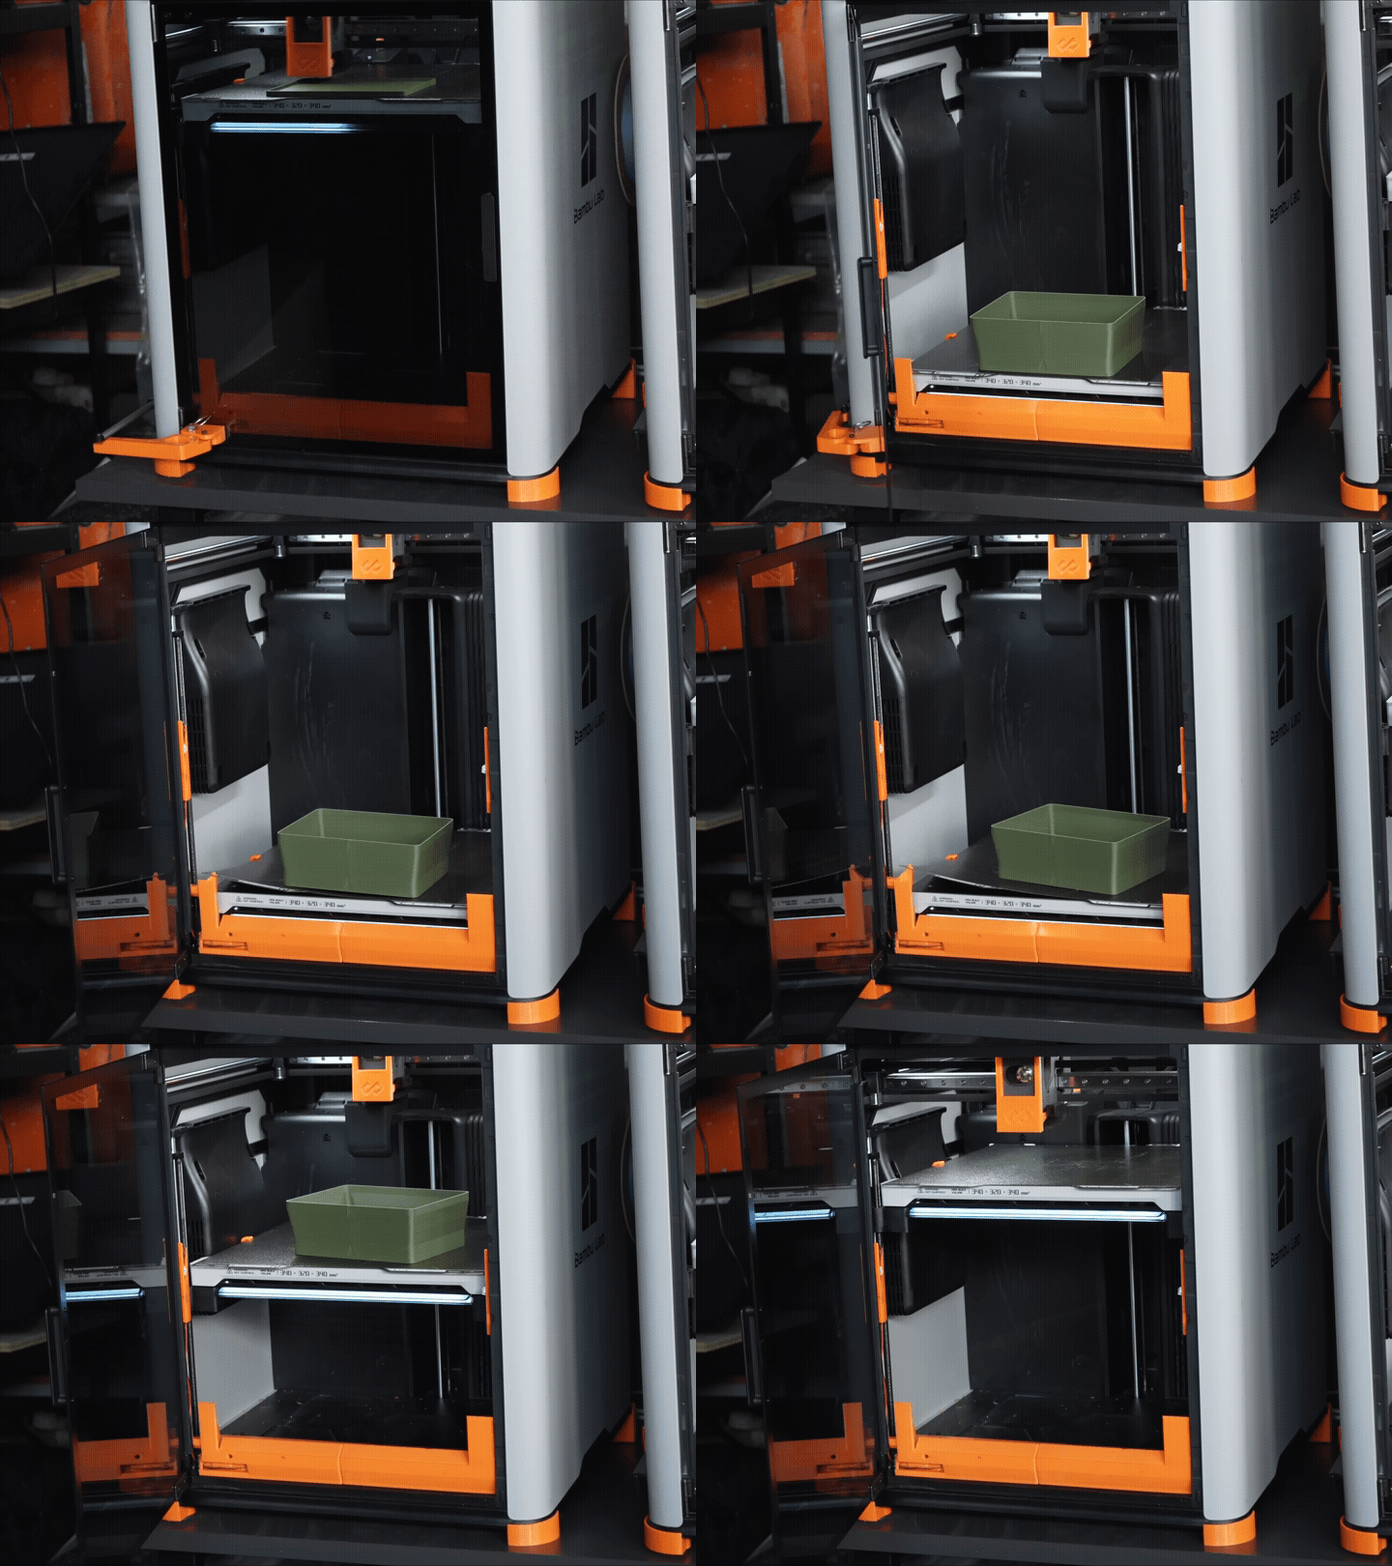


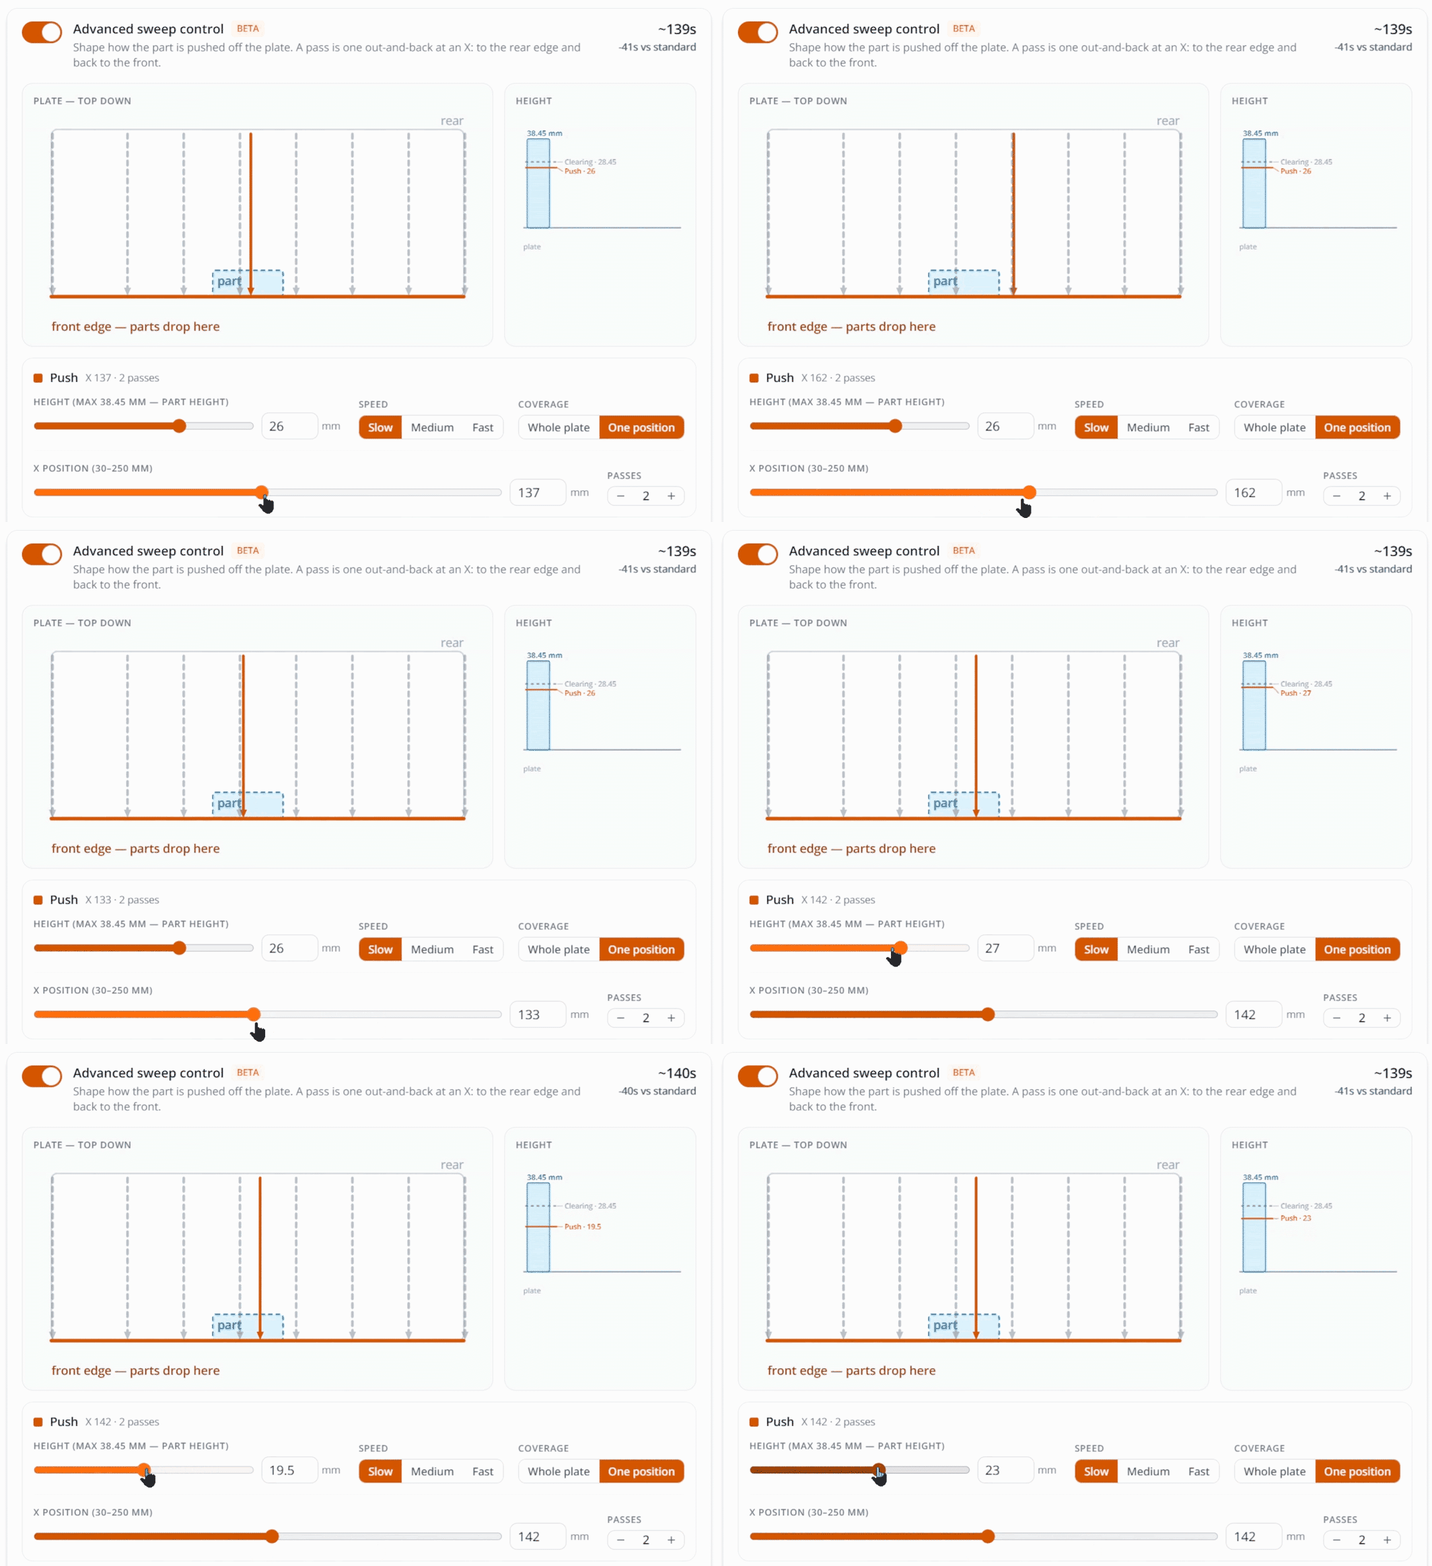
Three new tools just landed in the FarmLoop App, and all of them came from your input: support tickets, Skool threads, and the feedback replies you send after every newsletter. The newsletter version of this story was four paragraphs. This is the long version, with the detail you need to actually tune each feature.
All three live behind the Beta features switch, bottom right in the app footer, for Pro and Business accounts. All three change the G-code that gets printed, and all three can be switched off at any time, the app goes straight back to its normal behaviour.
A word on what "beta" means here: finished enough to use, but not yet through as many real print hours as the rest of the app. Feedback is the whole point. Try one on your next job and tell us what you'd change.
TL;DR
- Advanced sweep control lets you shape the push that clears your plate: number of pushes, height, speed and position, with a preview diagram of the path over your actual parts. Fixes the mixed-height plate problem.
- Trigger calibration presses the Stage 2 switch up to 3 mm deeper, in 0.5 mm steps, for printers that stop just short of it and silently never start the ejection cycle.
- Natural cooldown keeps the door shut and the fans off for the minutes you choose after the last layer, so ASA, ABS and PC cool evenly instead of lifting corners.
- All three are in Detachment tuning for Pro and Business accounts, behind the Beta features switch.
1. Advanced sweep control: clearing the mixed-height plate
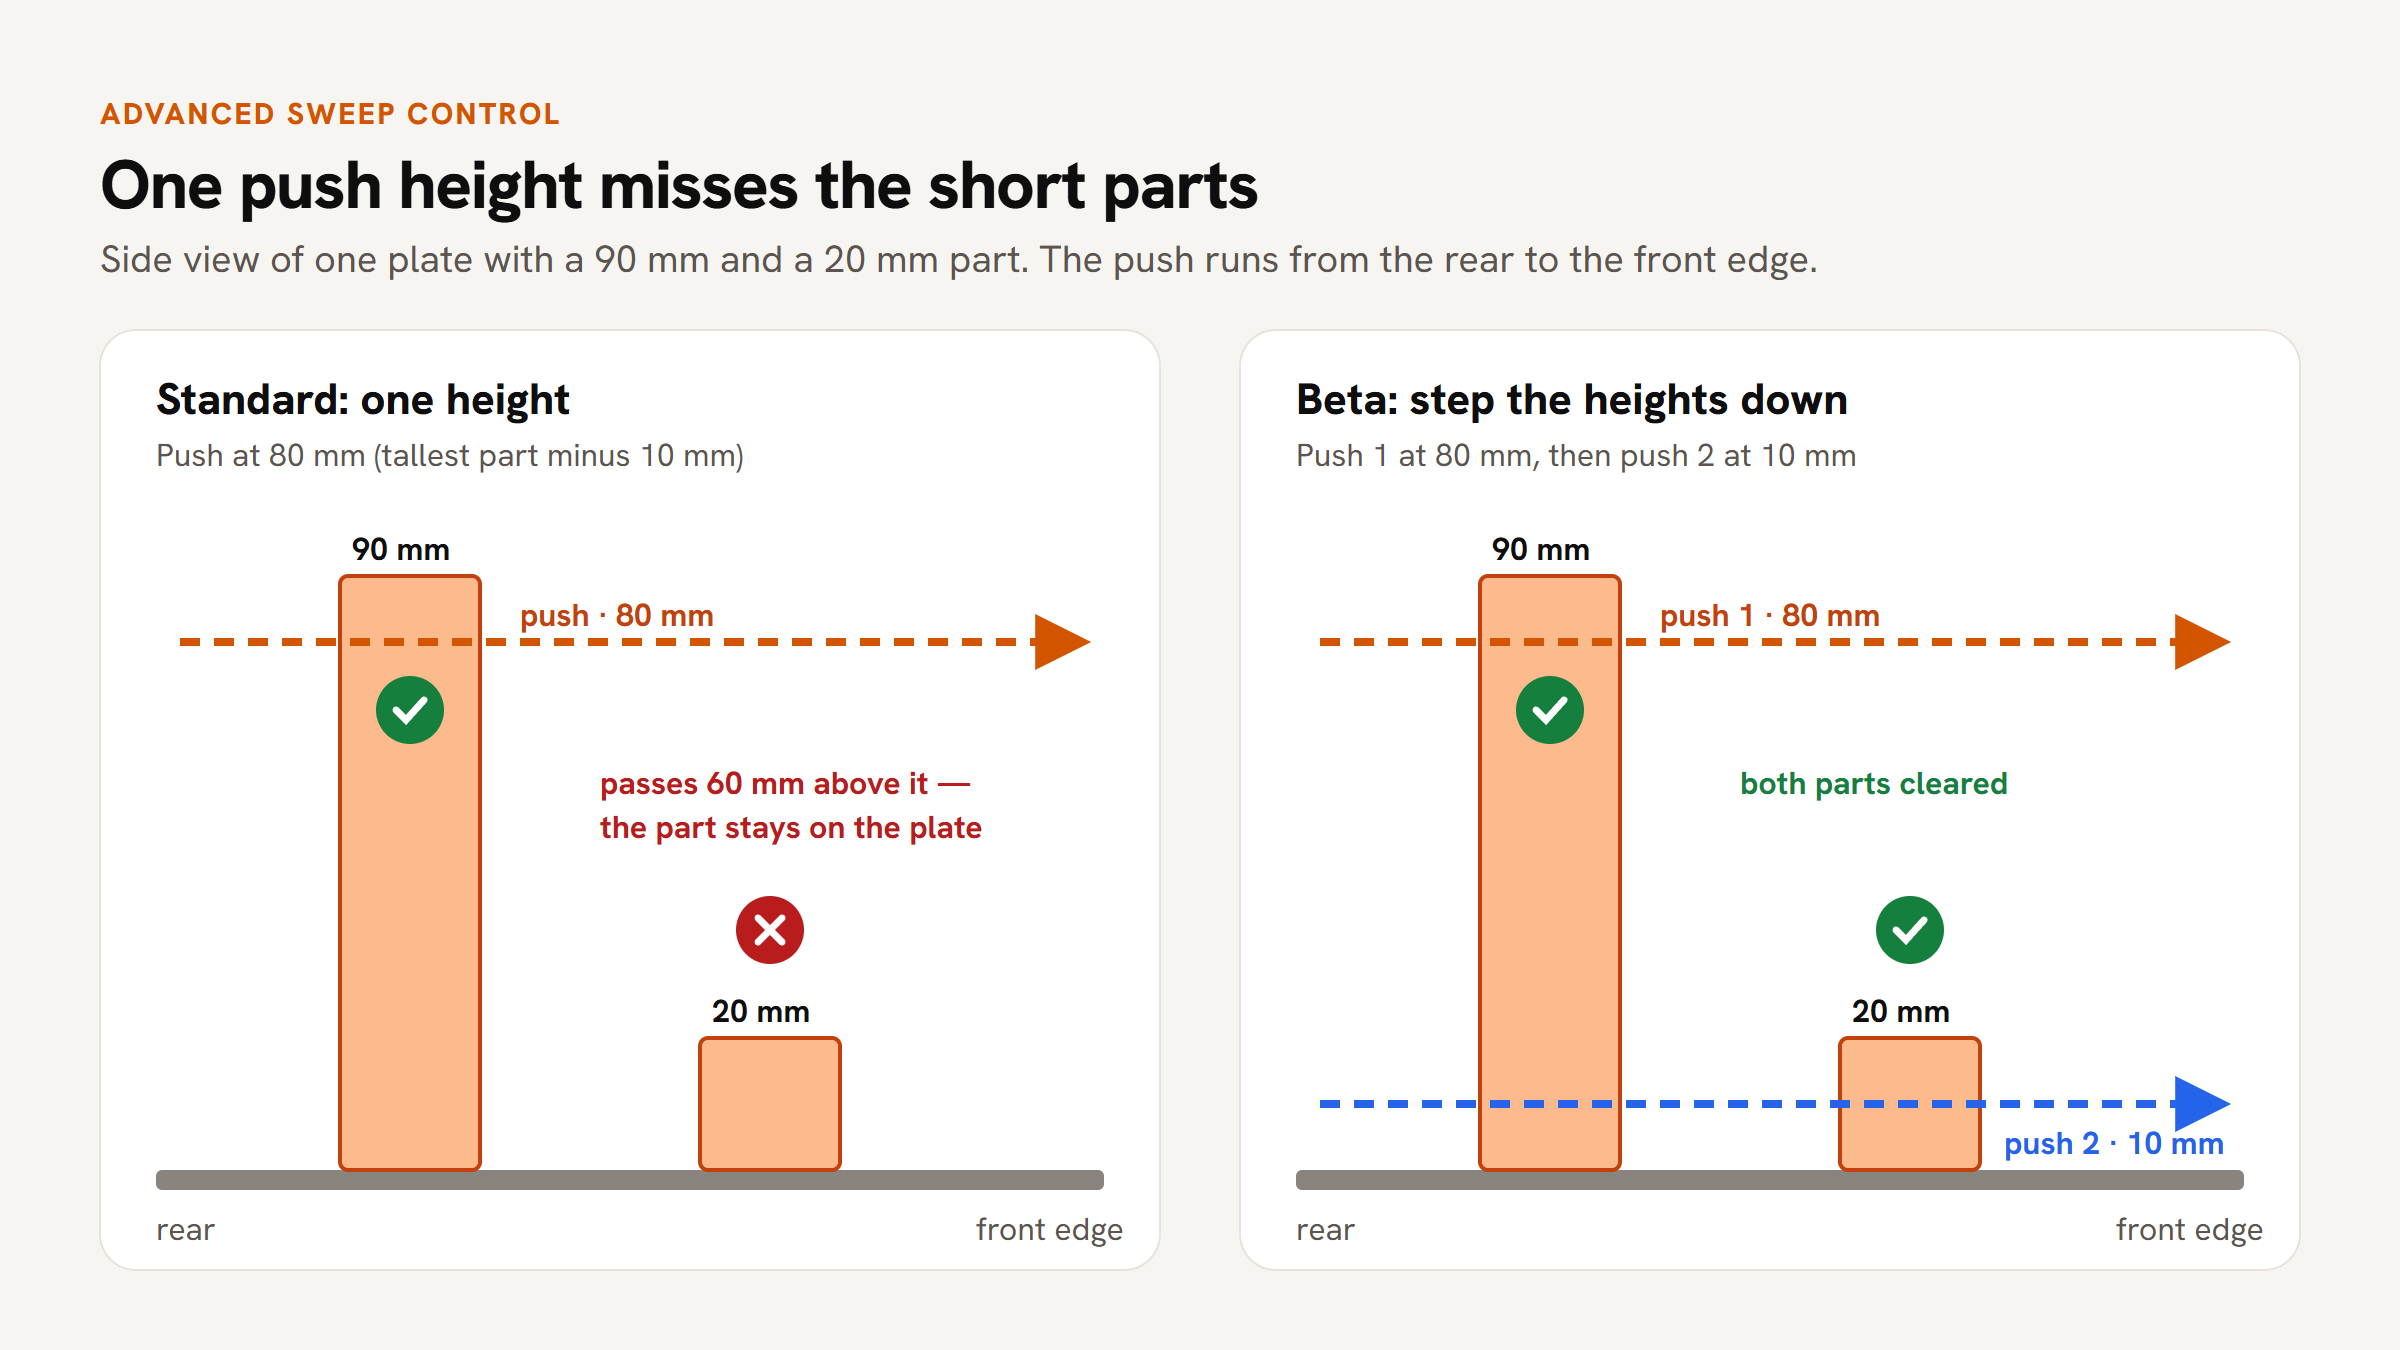
The problem. After cooldown, FarmLoop pushes the finished parts off the front edge of the plate. The standard routine uses one push height, worked out from the tallest part on the plate (tallest part minus 10 mm), followed by clearing passes. On a plate that mixes tall and short parts, one height is not enough. A push at 80 mm clears the 90 mm part and passes 60 mm over the 20 mm part beside it, which stays on the plate. And a part that stays on the plate is the one thing an automated farm cannot tolerate.
What you can set now:
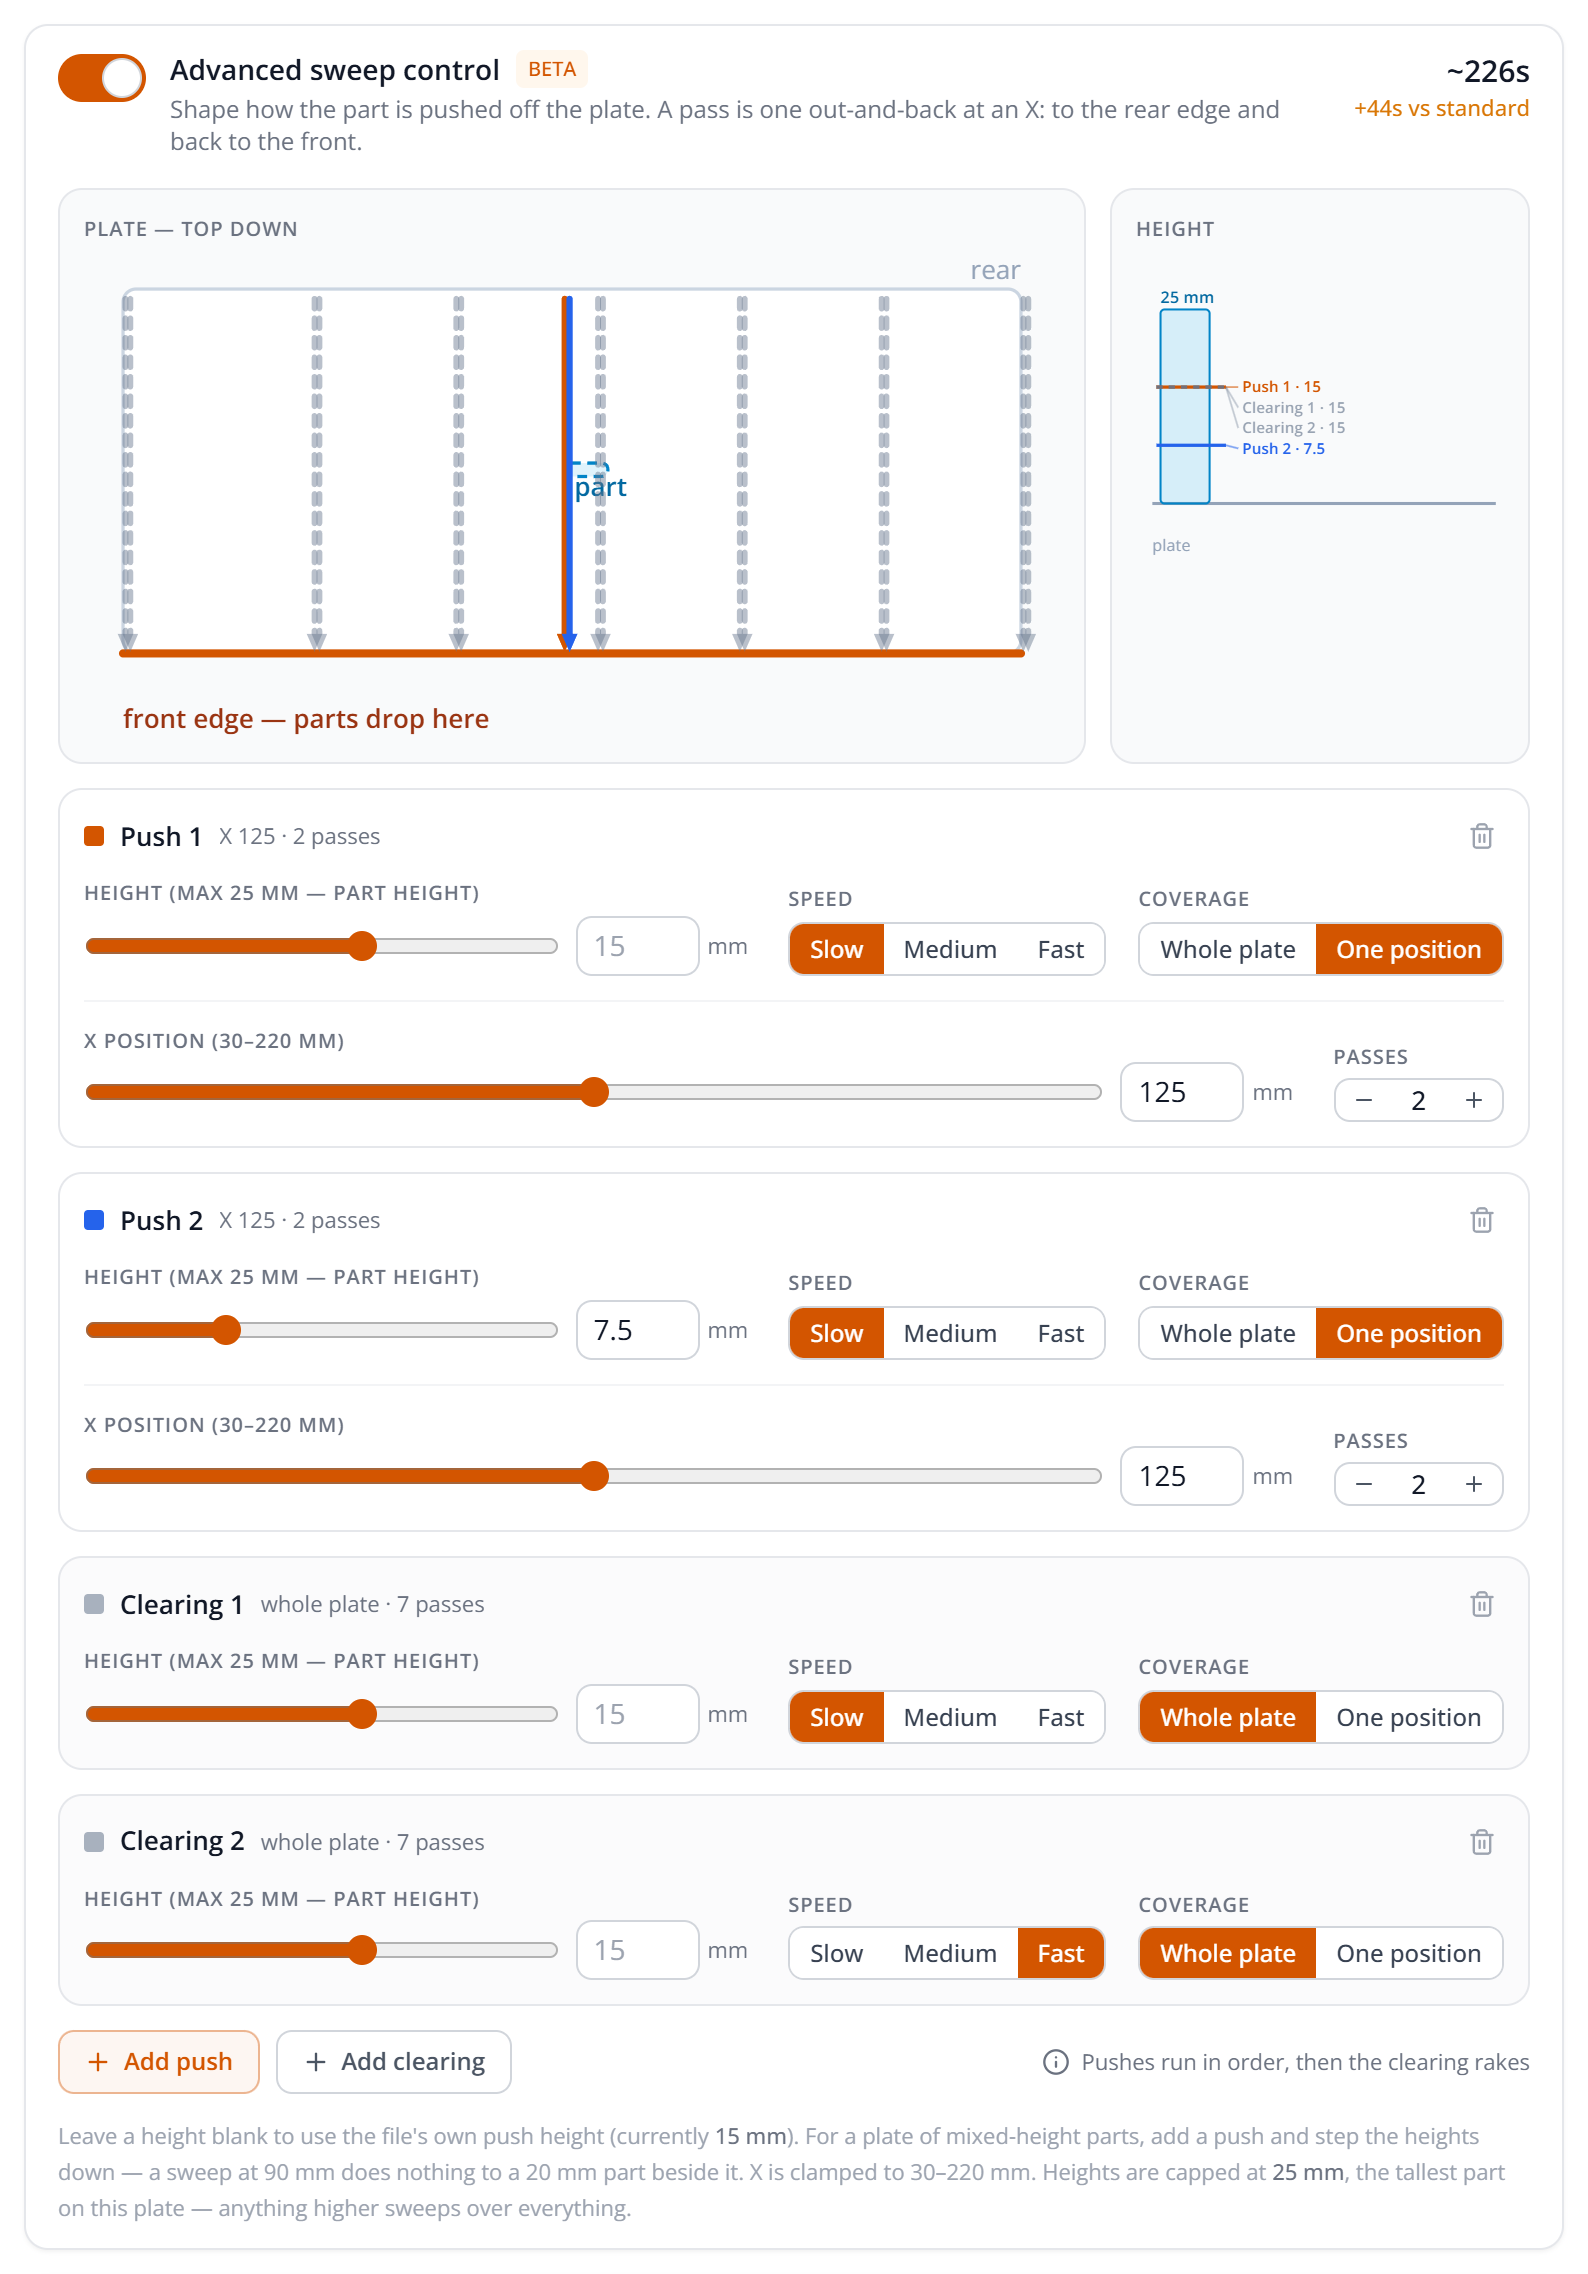
- Pushes: add as many as you need. Each push has its own height (capped at the tallest part), a speed (slow, medium or fast), and a coverage: the whole plate, or one position you pick on a slider with a set number of passes.
- Stepping down: for mixed-height plates, add a second push lower down. 80 mm first, then 10 mm, and everything comes off.
- Clearing passes: the rakes that sweep the whole plate at the end. Add them, remove them, change their speed.
- Preview: a diagram shows the push path over your actual plate, seen from above, with a height view beside it. You see what will be swept before you print.
- Time: the app shows how long your routine takes against the standard one, for example "~226 s, +44 s vs standard", so you can decide whether a cleaner sweep is worth the cycle time.
Two details that matter in practice. Switching the feature on changes nothing by itself: it starts from the standard routine exactly, and nothing changes until you edit something. And between pushes the toolhead returns to a safe position before dropping to the next height, so a lower push never drives through a part.
You find it under Detachment tuning, push mode. It works on every printer FarmLoop supports: Bambu Lab A, P, X and H series, Elegoo Centauri Carbon, Prusa Core One, Snapmaker U1 and Flashforge AD5X.
2. Trigger calibration: for the Stage 2 that silently never starts
The problem. Stage 2 starts its cycle mechanically: the printer presses a switch. On the P, X and H series the bed moves down onto it, on the A series the gantry rises into it. If the machine stops a fraction of a millimetre short, which happens with printer and mounting tolerances, the switch never clicks. Stage 2 then silently does nothing. No door, no bending, no push, and no error either. The limit switch was never 100% reliable for everyone, and this is why.
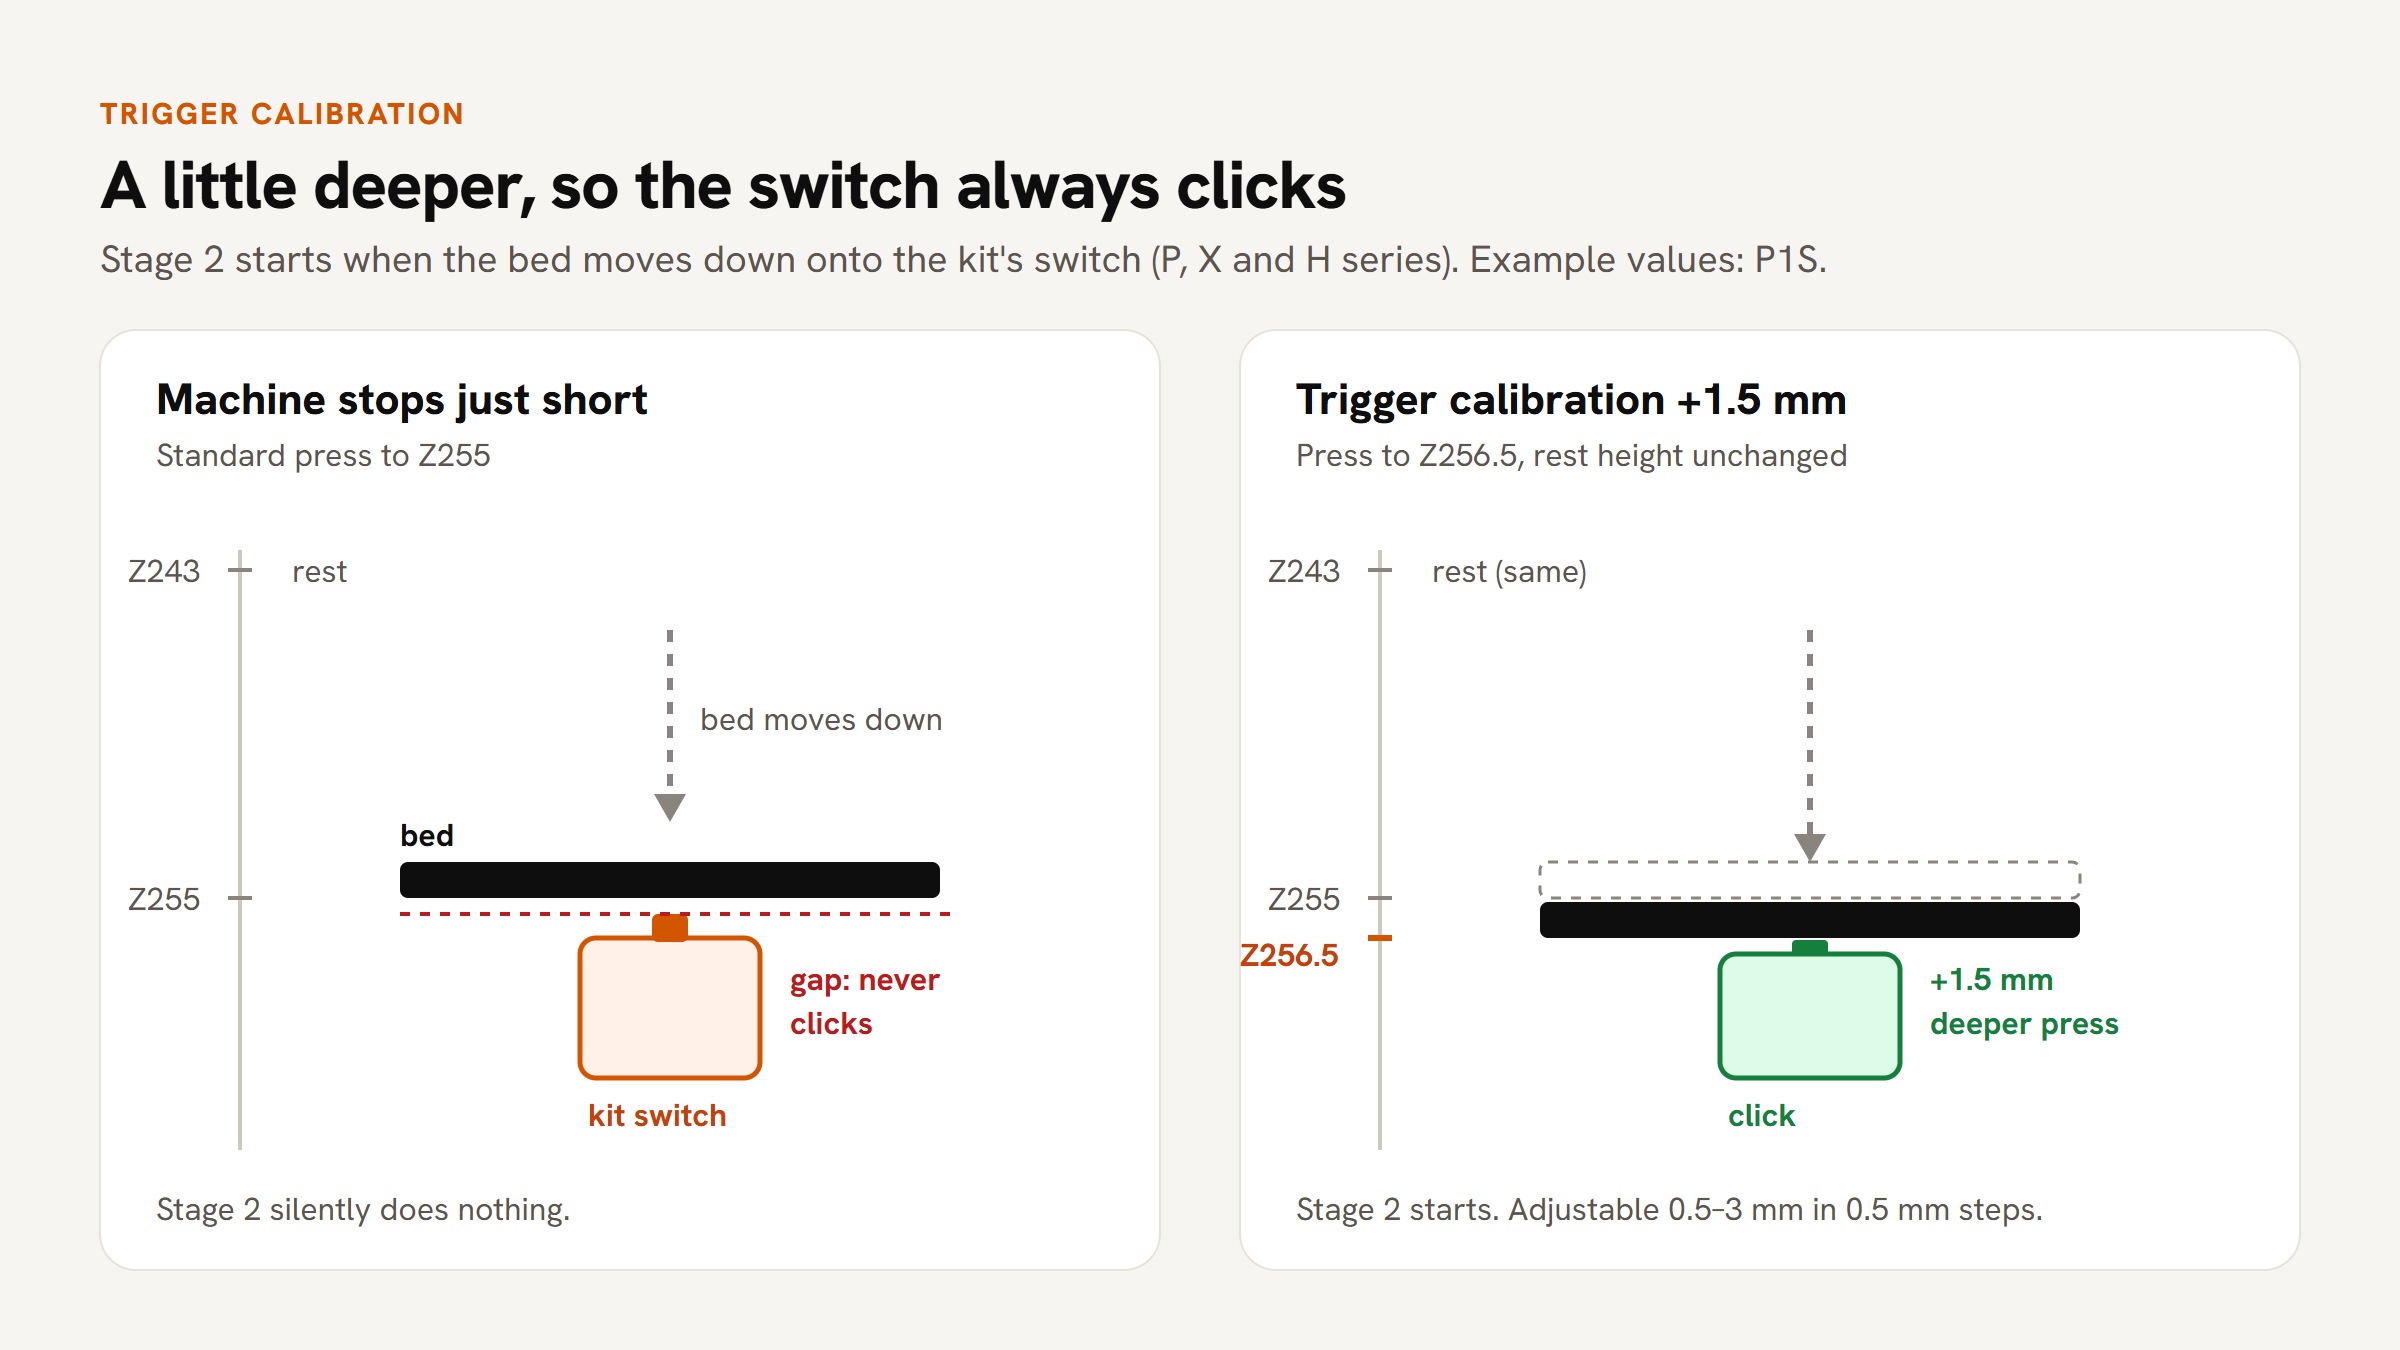
What it does. The press goes 0.5 to 3 mm deeper, in 0.5 mm steps, starting at 1 mm when you switch it on. Only the press moves deeper, the rest height stays unchanged, so the stroke simply gets longer. The app shows you the exact height it will press to. On a P1S at +1.5 mm, for example: "Presses to Z256.5 instead of Z255 on every trigger." No guessing.
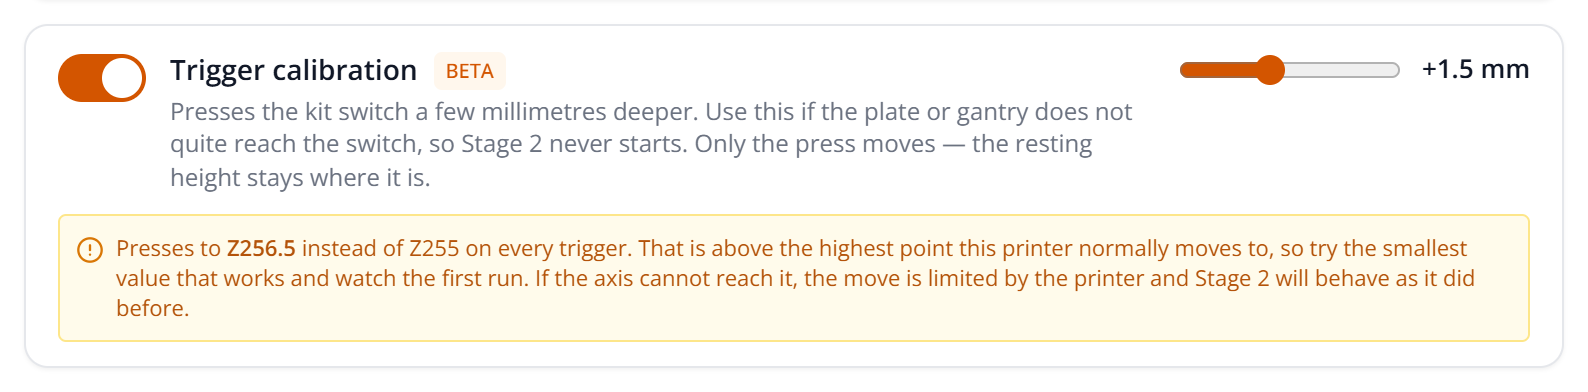
One safety note, straight from the app: this goes past the highest point the printer normally moves to. Start with the smallest value that works and watch the first run. If the axis cannot reach the target, the printer limits the move and Stage 2 behaves as it did before.
You find it under Detachment tuning, Stage 2 only (Stage 1 has no switch). Supported printers: Bambu Lab A1, A1 mini, P1P, P1S, P2S, X1C, X1E, X2D, H2S, H2D, H2C, Elegoo Centauri Carbon, Prusa Core One and Snapmaker U1.
3. Natural cooldown: the ASA warping fix
The problem. Standard Stage 2 goes straight from the last layer to "open the door, fans on". For most materials that is exactly what you want, faster cooling means faster detachment and a faster loop. For ASA, ABS and PC it is the worst case: the part is still hot and still stuck to the plate, and cold air hits it from one side. That uneven shrinking is what lifts corners and splits layers. This was the most requested feature of this round, suggested by those of you printing ASA.
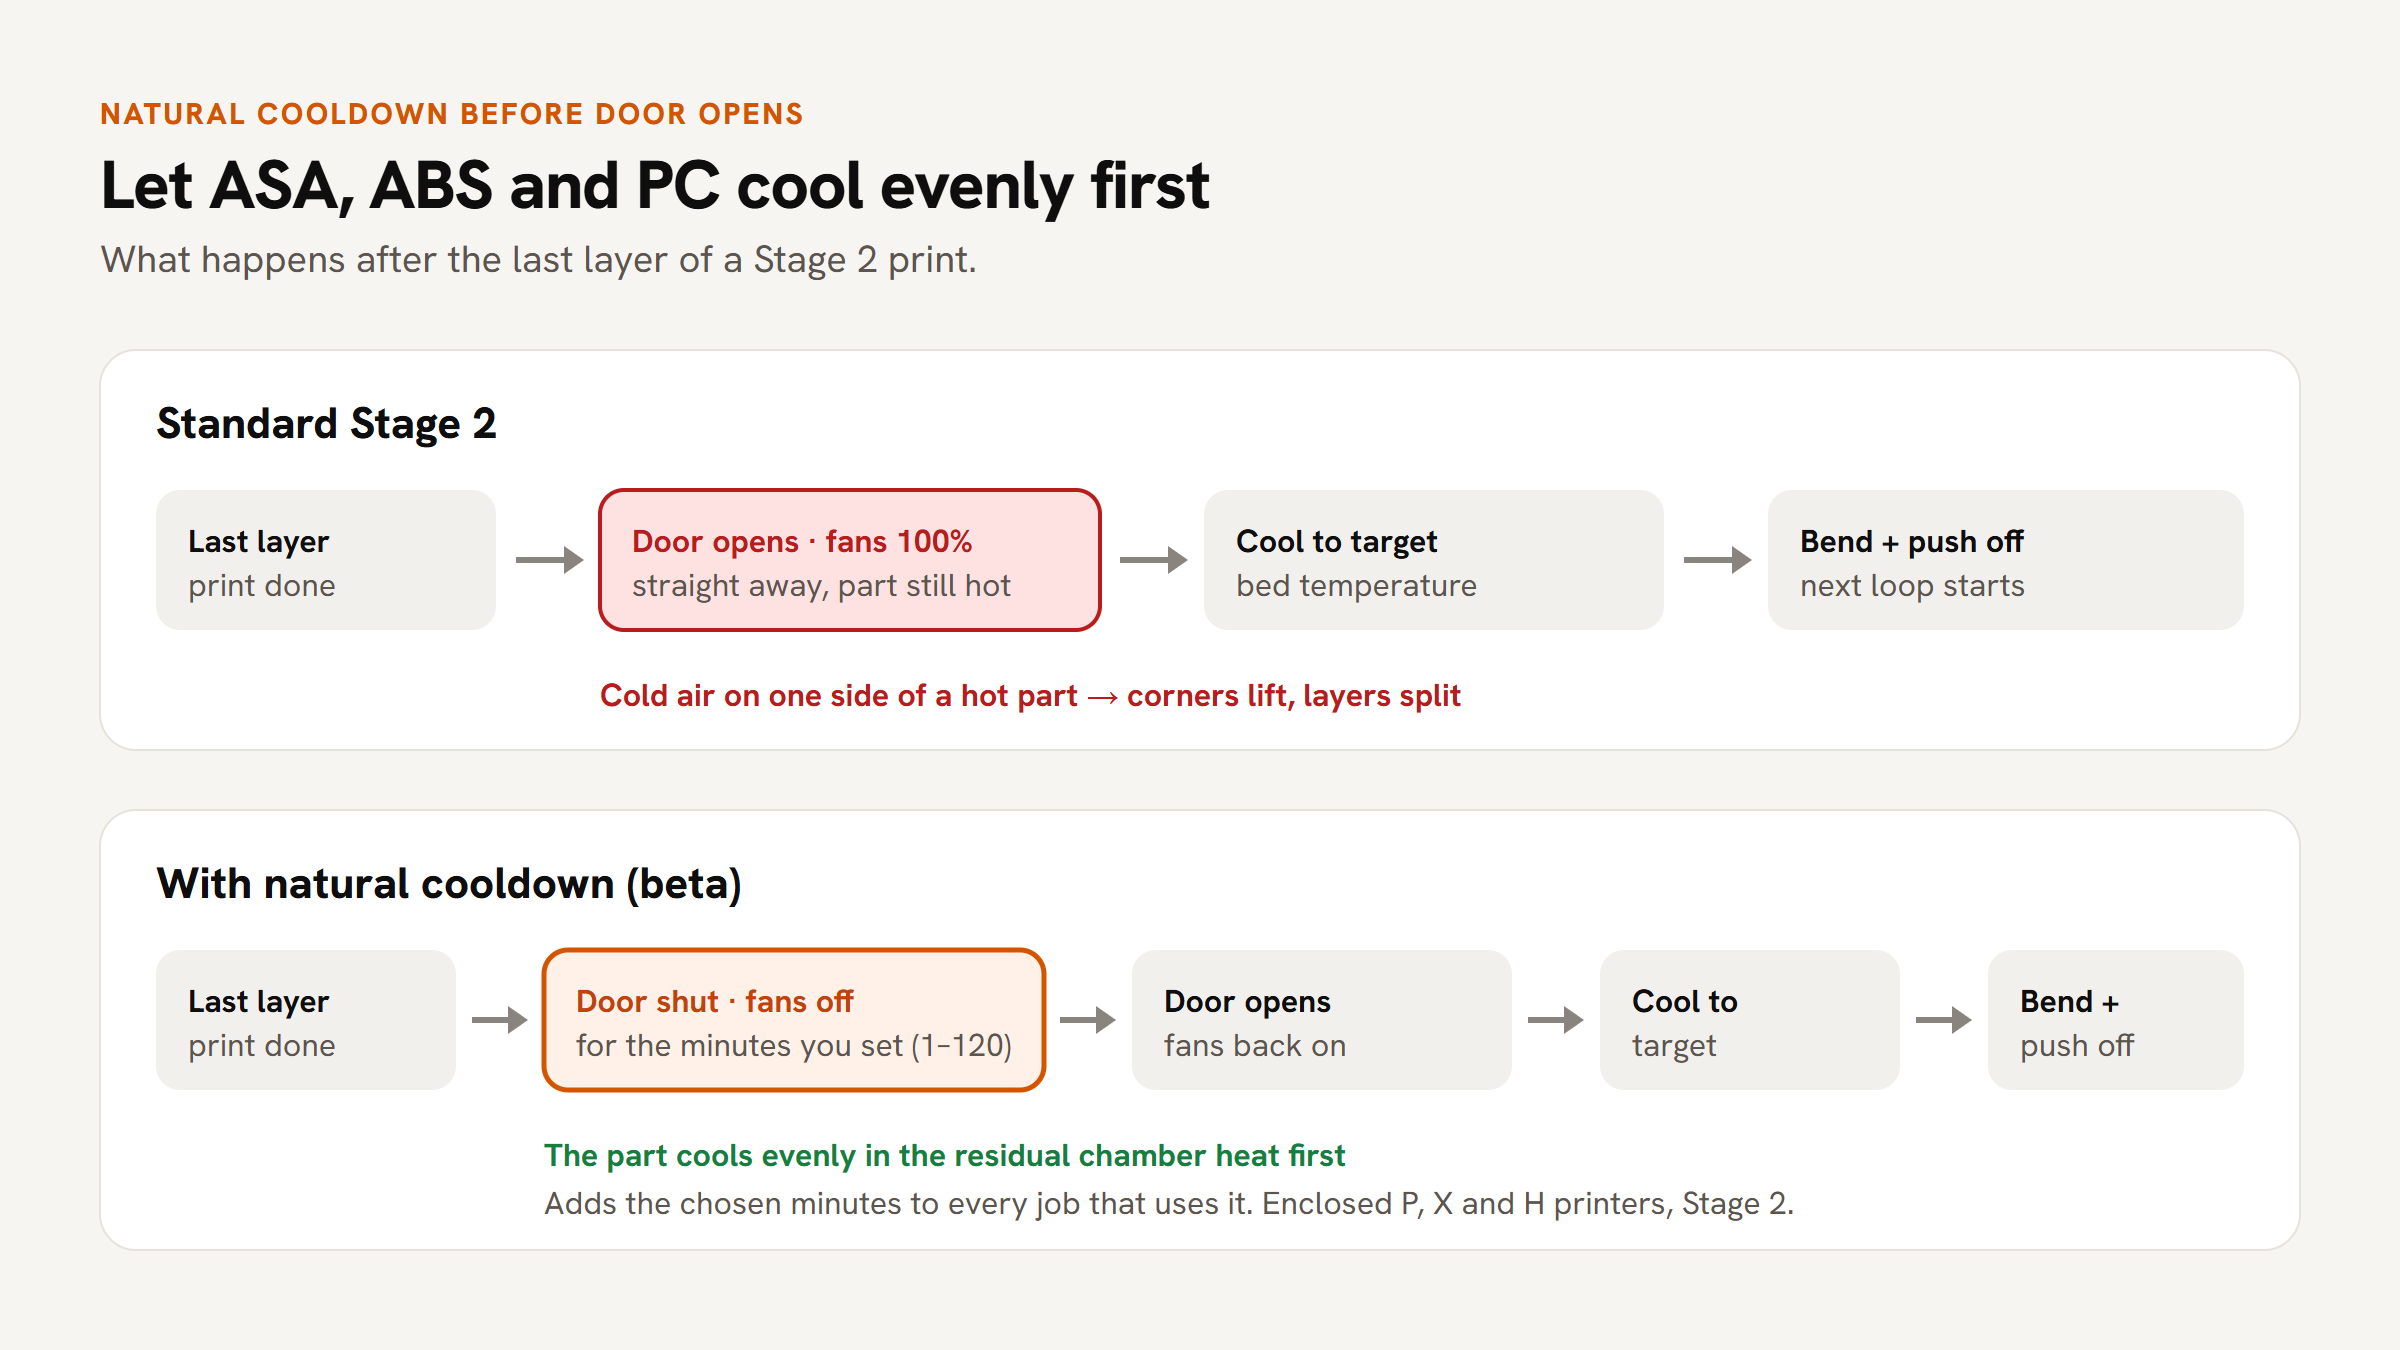
What it does. After the last layer, the printer waits with the door shut and the fans off for the number of minutes you choose, 1 to 120, the app suggests 10. The part cools evenly in the heat still in the chamber. Then the normal Stage 2 sequence continues: door opens, fans come back on, the plate cools to your target, bend, push. The trade is simple: you add the chosen minutes to every job that uses it, and you get parts that stay flat.

You find it under Detachment tuning, Stage 2 on the enclosed Bambu Lab P, X and H series. The app recommends it for ASA, ABS and PC.
If you already used it in beta: we shipped a fix on 29 September. The fans now come back on after the wait, where before they stayed off for the rest of the cooldown, and the wait now always sits right before the door opens. Process your files again to pick up the fix.
How to try them
Switch on Beta features at the bottom right of the FarmLoop App. The first time you turn it on, a short dialog lists what is included and marks each feature either "Changes the G-code that gets printed" or "Read-only". Try one on your next job, and then tell us what you'd change: reply to the newsletter, post in Skool, or use the feedback form in the app. That feedback is the whole point of a beta.
Beta features are for Pro and Business. Business is new.
Beta features are available on Pro and Business accounts. Business is the new tier for the bigger farms, and it exists because businesses kept asking for it. The headline feature is API access to the G-code engine: instead of processing files in the browser, your print farm management software sends the G-code, our server processes it, your farm keeps looping. Business also gets prioritized support and prioritized feature requests, it is USD 29 per month at launch with the price locked for life for everyone who joins now, and annual subscribers get 15% off all Stage 2 kits.
Frequently Asked Questions
Who can use the FarmLoop beta features?
Pro and Business accounts. Lite accounts see the Beta features switch in the app footer but cannot turn it on. Switching beta off at any time returns the app to its normal behaviour immediately.
Do the beta features change my G-code?
Yes, all three of these features change the G-code that gets printed: advanced sweep control changes how parts are ejected, trigger calibration changes the press depth, and natural cooldown changes the sequence after the last layer. The app marks every beta feature as either "Changes the G-code that gets printed" or "Read-only" when you switch beta on.
Why does my FarmLoop Stage 2 sometimes not start the ejection cycle?
Usually the trigger switch. Stage 2 starts when the printer presses a mechanical switch, and if the machine stops a fraction of a millimetre short due to printer or mounting tolerances, the switch never clicks and nothing happens, with no error shown. Trigger calibration fixes this by pressing 0.5 to 3 mm deeper. Start with the smallest value that works and watch the first run.
How do I stop ASA and ABS prints from warping in an automated print farm?
Avoid hitting the hot part with cold air while it is still stuck to the plate. FarmLoop's natural cooldown keeps the door shut and the fans off for 1 to 120 minutes after the last layer (10 is the suggested start), so the part cools evenly in the chamber heat before the normal cooldown and ejection sequence runs. It is available for Stage 2 on the enclosed Bambu Lab P, X and H series and recommended for ASA, ABS and PC.
How do I clear parts of different heights from one plate automatically?
With advanced sweep control, step the push heights down: a first push at the height of the tall parts, then a second push lower for the short ones, then clearing passes. The preview diagram shows the path over your actual plate before you print, and the app shows how much cycle time the extra pushes cost.
Which printers support the new FarmLoop app features?
Advanced sweep control works on every printer FarmLoop supports in push mode: Bambu Lab A, P, X and H series, Elegoo Centauri Carbon, Prusa Core One, Snapmaker U1 and Flashforge AD5X. Trigger calibration is Stage 2 only: Bambu Lab A1, A1 mini, P1P, P1S, P2S, X1C, X1E, X2D, H2S, H2D, H2C, Elegoo Centauri Carbon, Prusa Core One and Snapmaker U1. Natural cooldown is Stage 2 on the enclosed Bambu Lab P, X and H series.
What is the FarmLoop App Business tier?
Business is the FarmLoop App tier for larger print farms: API access to the G-code engine so your own farm management software can process files directly, prioritized support, prioritized feature requests, and 15% off all Stage 2 kits on the annual plan. It is USD 29 per month at launch, and the launch price stays locked for life for everyone who subscribes now.
Wrap-up
Three problems you told us about, three tools that fix them: the mixed plate that never fully clears, the Stage 2 that silently never starts, and the ASA corners that lift the moment cold air hits them. Switch on Beta features in the FarmLoop App, test them on your next job, and tell us what you'd change. The next round of features comes from that feedback too.
– Yanyan